Tuesday 31 March 2015

PAPPU PASS HO GAYA!

   Pooooooooooohhhhhhh !!!!!!!!!!! Finally the result for the play group is declared today. I went with Abi to school to collect it. More than the result I was eager to see other parents and the class teacher, how happy and excited they are about their own achievement (not the children). Even though the school can not detain any child till class 8, all the parents were so anxious to see the result!

   I think the vacation did him good. Although he was refusing to go to school in the morning initially and I had to bribe him saying that we will go 'ghoomi ghoomi' (which means outing) after the visit to school which I fulfilled after collecting his performance certificate. Then when we reached his school, surprisingly, Abi took my hand and guided me to his class with great pride! As soon as I sat on the chair, he left me with his teachers and  went off to play with the toys there. May be he missed them,  for he had holidays for the past ten days.I could see some changes in him today but I'm keeping my fingers crossed as the school is reopening on 6th April.   Here is the great certificate! (with name of school, teachers, etc omitted)

Thursday 19 March 2015

Methi kulambu


I was so happy that Abi liked the variation I made with 'puris' and my garden is still full with greens such as methi, palak,pudina and dhania. Since we are a little conscious about our food especially fried food, I thought of including 'methi' in a different way (though the pooris are very tempting) in our main course. Thus, the 'Methi Kulambu'. It tastes so good with rice. The best thing about this recipe is you can't go wrong. So go ahead and give it a shot.


Ingredients:
1. Tuvar dal :  1/2 cup
2. Cleaned, chopped methi leaves : 1 cup
3. Onion/ Shallots :  1or 1/2 cup (cut lengthwise)
4. Tomatoes medium chopped : 3
5. Garlic :  4or5(chopped)
6.Green chillies :  2 (or to taste)
7. Coriander powder :  1/2 teaspoon
8. Haldi powder :1/4 teaspoon
9. Mustard seeds :1/4 teaspoon
10.Curry leaves : a few.
11. Jeera  : 1/4 teaspoon
12. Oil :  1 teaspoon

Method:
1. Clean and wash dal.Add water, put it in the cooker and cook till the dal is well cooked (2 or 3 whistle).
2. Heat oil in a degchi, add mustard seeds.When it crackles add jeera and garlic.When garlic changes its colour add curry leaves, onions and green chillies.Saute them till onion is pink in colour.
3. Now add the tomatoes,salt coriander powder and haldi. Cook it on slow heat till the tomatoes are cooked nicely (Adding salt fastens cooking of tomatoes).
 4.Add methi leaves, mix it nicely and let it cook well.
5. When the leaves are cooked add the dal, adjust water and seasoning. Let boil for a few minutes.
6.Remove from heat, garnish with coriander leaves or dollops of butter or fresh ghee and serve hot with rice.

Wednesday 18 March 2015

Methi Puris


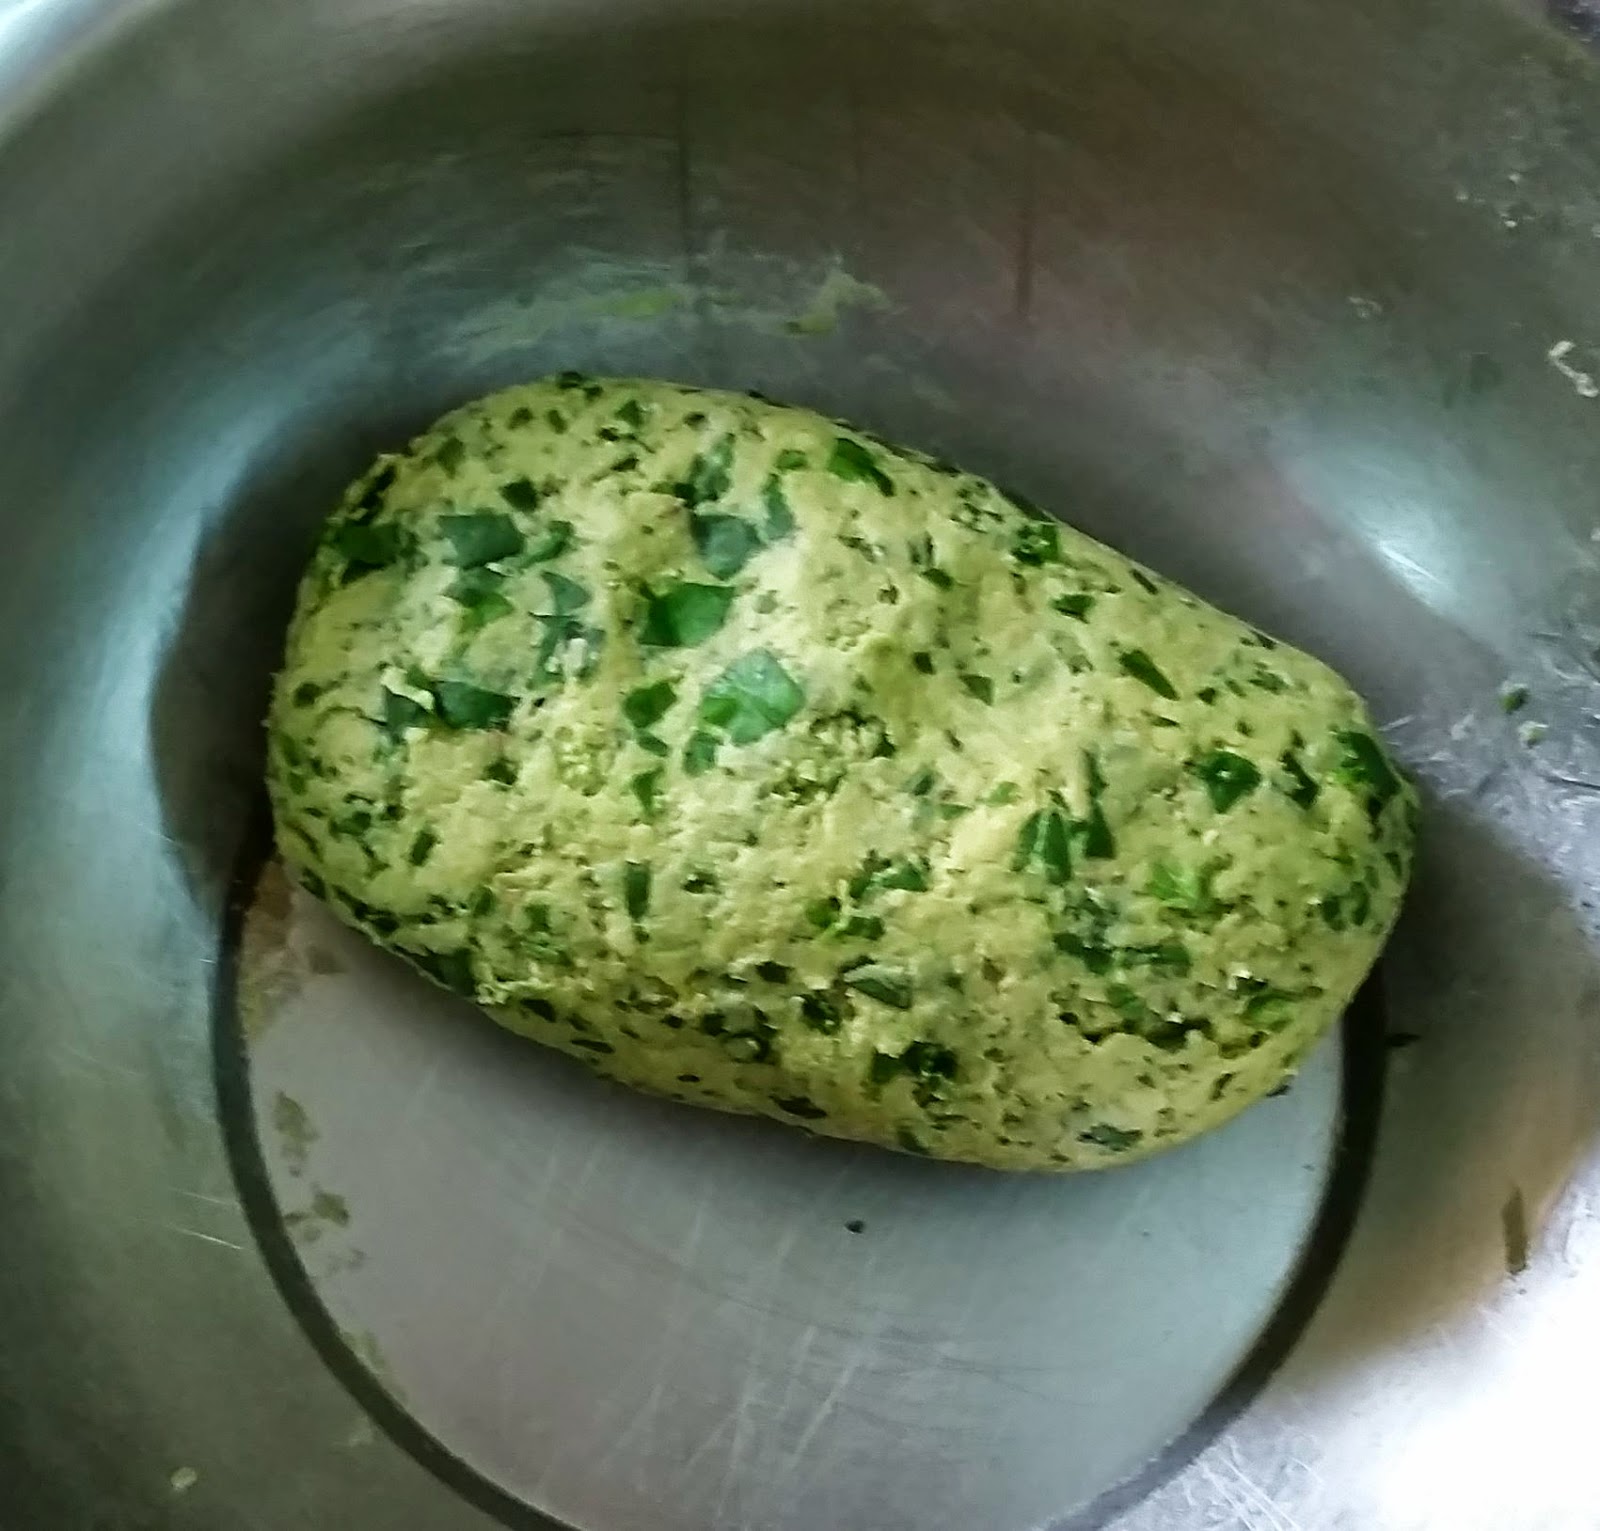
Abi likes "Puri" but not the "aloo" veg I give him with it. So I was thinking of a new way to give him his favourite puri (at the same time include the veggie) so that he does not get bored of eating plain puri.To make it more colourful and nutritious I added "Methi" to the dough and made puris for him. I passed in my test for the day because not only did it look appealing, Abi was very happy that he did not have to eat vegetables! Win win situation for both of us! Something that makes my Abi smile definitely deserves to be put up for Blogging Marathon! Check out the Blogging Marathon page for the other Blogging Marathoners doing BM#50
Ingredients:

1. Wheat flour- 1 cup
2. Washed and chopped methi - 1cup
3. Ajwain,Pepper and Salt- To taste

Method:

Take a wide mouth vessel, add all the ingredients.
Mix with your hand nicely without adding any water first.
Once the methi and flour is mixed nicely, add a little water at a time to make a soft dough. Be careful not to add too much water as the methi also leaves water when you knead.

Make lemon sized balls and keep them ready.
Heat oil in a wok/ kadai
Take a ball and roll it nicely (neither too thin nor too thick).
Drop it in the hot oil, press it lightly with the ladle till it puffs up.Turn it and press the other side also. Remove when it turns golden brown.
Repeat till you finish the balls.
Makes about 12 to 15 puris of small size.
Remember not to keep the dough for long before frying as it becomes loose.
Serve hot with chutneys of your choice or pickles, specially lemon pickle (sweet) although you do not necessarily need any side dish.

Tuesday 17 March 2015

Methi - Carrot Mixed Veg

 This season we were lucky to get a lot of fresh vegetables from our garden. Especially greens have been one of our favourites in planting as well as eating. There are many local varieties of greens here, but one of our all time favourites is methi. Carrots too came out very well! So here's a methi-carrot dish popular in our home which we prepared throughout the winter of 2014-15 - a time we will always remember for the bounties we enjoyed from our kitchen garden! Since BM also happened at the same time, I decided, why waste this opportunity! Here goes!Check out the Blogging Marathon page for the other Blogging Marathoners doing BM#


Ingredients:
1. Methi leaves : 2 cups (cleaned and chopped)
2. Carrot : 1 cup (chopped)
3. Onion : 1 large (chopped)
4. Tomatoes : 2 (finely chopped)
5. Green chillies : 2 (slit)
6. Coriander powder : 1/2 teaspoon
7. Jeera powder : 1/4 teaspoon
8. Haldi powder (turmeric) : 1/4 teaspoon
9. Red chilli powder : 1/2 teaspoon
10. Salt : To taste
11.Jeera : 1/4 teaspoon
12. Garam masala : 1/2 teaspoon
13. Amchoor powder : 1/2 teaspoon
14. Oil : 2 teaspoon

Method:
1. Clean and chop the methi leaves. Scrape, wash and chop the carrots .
2. Peel and chop the onions. Wash and chop the tomatoes.
3. Heat oil in a kadai, add jeera.When jeera changes the colour add the onion and the green chillies.Saute them till onion turns pink and soft.
4. Add chopped tomatoes,salt and haldi. Cook till the tomatoes are mushy,add coriander powder,jeera powder  and chilli powder.

5. Cook for a while then add carrots. Cook till carrots are half-done.
6. Now add the methi leaves, mix it nicely  cover and let it cook. Keep stirring once in a while.

7. Once the vegetables are cooked add amchoor and garam masala,mix well .
8. Remove from the heat and serve hot with Rumali parantha or Roti. 

Monday 16 March 2015

Exam Fever Already!

Here is Abi's Date-sheet and Syllabus


EXAMINATIONS!  In the past, when I read these words I didn't give much importance to it. It only meant more work- question paper to be set, bundles of sheets to be checked and the result to be made. As a teacher I used to tell children, if you are up to date with your school work/studies, then you don't have to worry about exams. Exams or no exams, it will make no difference.  As a parent, it never mattered much to me as our daughter was in a boarding school. Thanks to that and the school, neither my daughter nor we as  parents had any such thing like 'exam fever'. I used to think all that is media hyped and over ambitious parents own creation.


LOL!!! Now I'm having EXAM FEVER! Abi is not even 3 years old and just in play school but his "play school" is having final exams from 16 to 21st of this month! The problem is, he is not willing to recite any poem or numbers at home. In fact he is not even ready to talk anything about school or studies. He knows most of his poems and recites them on his own will when he is in a good mood. But he refuses to do his home-work or open his 'All in one' book to read. If we compel  him to do any of his home work, he throws the note-book or turns his face away from the book. We thought he will show interest in his school activities slowly. But NO. In spite of  spending 9 months in school, its like the 'first day' even today. So we do not know how to make him prepare for his exam. Yes, exam fever exists.....

PS: It is another thing that I don't believe in conducting exams for such tiny tots.


Friday 13 March 2015

Beautiful future in present

   Reposting this one because it seems to have vanished from my published posts!

The D-day  was on 27-02-2015. I had done the reservation 2 months in advance. Finished my packing much in advance. It was my best friend's son's wedding in which the girl is a south-indian(my country cousin). I myself have not seen a south-indian-brahmin wedding (the rituals) except in 2 States. So the excitement was double. The only hitch was I have travel sickness. But never mind the sickness, after all it is my best friend's son's wedding.. Finally the D-day arrived. We reached the station in time.

  As the train arrived (only 15 min late) my heart sank. The train looked so very dirty from outside. From my 35 years of travelling experience, I knew what to expect inside. Anyhow, I entered the bogey, (bogey no. was not written outside, confirmed it with occupants) looking for seat no-3. Lol! Seat was already occupied by an elderly couple. I had knots in my stomach. Another passenger was also a lady. The elderly couple was not able to explain properly so the other lady told me that they are travelling with their grand son and I should talk to him. As I waited for him to return from the pantry, my husband ran to find the TTE. He was worried as I was travelling alone. 

  By then the grand son came back and I told him they are occupying my seat. He said his grand mother can't climb up to the upper birth (the other lower birth belonged to another lady) and he had exchanged seats with some other people and they in turn with some body else(it was a little complicated). I didn't have the heart to claim my own seat and settled for the side birth as per their arrangement. It was time for the train to leave, my husband came with the TTE. I told them everything is fine and settled. 

   As we tried to strike up a conversation, the boy made some black tea for his grand parents and offered a cup to me also. Without even the customary 'no thank you' I had the tea and biscuits because I had already started feeling sick. It felt so nice after that and I slept off for 2-3 hours. It was only when I woke up and started chatting with them that I learnt that the old couple are the boy's nana-nani and he is accompanying them to their other daughter's place. I instantly thought of Abi. Throughout the journey the boy looked after his grandparents so well (not only them, but me also). It was a pleasure watching them and the 3 were a great company. It took me to another world where I could see Abi doing all that for us when he grows up. Throughout the journey I visualised the 3 of us (my husband,me and Abi) travelling to all sorts of places. I was so engrossed in my dream that I didn't realise when the train reached my destination (12 hrs journey). 

   Of course, he helped me to get down at the station and stood with me till my friend caught up with me. I said good-bye to three of them and even though I can't remember the boy's name , this is  one experience I'll cherish for ever. Its because of them that all my travelling fear and discomfort vanished and I call it as a Beautiful Future / Journey.

Friday 6 March 2015

Floating Island

Check out the Blogging Marathon page for the other Blogging Marathoners doing BM#50


   Floating Island is one of my most successful dishes in life. Being an Army officer's wife, we have had many occasions to host parties. Sometimes I try out new dishes for my guests but there have been times when I was not in a mood to put in so much effort and yet wanted to give them a nice exotic sounding dish which wasn't too taxing for me. This is that 'Go-to' dessert of mine for important occasions.

   I have prepared this now for Blogging Marathon #50 entry. It has given me great pleasure to make it for such a wide audience.  At the outset I want to state a disclaimer that the pictures aren't that great because I couldn't pause for clicks while making. So I handed the camera over to my daughter and told her to keep clicking as I cook as I wont be able to stop midway. Yet I have added more photos than usual for clarity. So please bear with them :)

   The best part was that Abi enjoyed giving me hand in this, especially in decorating the islands :) He just loves custard. Even when unwell, that's the one thing he will eat without a fuss. Thanks BM for making me make this dessert!!

Ingredients :

1. Eggs :2 nos (yolks separated)
2. Milk : 1 lr
3. Sugar :1/2 cup (as needed)
4. Custard powder : 3 level table spoon 
(see instructions on the packet)
5. Essence of your choice : 1 teaspoon
6. Raisins, herbs and fruits of your choice : To decorate

Method :
1. Boil the milk in a wide kadai and let it remain on the stove in the lowest heat.
2. Separate  the egg yolks. Beat the egg whites till it forms a peak like shown in the photo.

3. Take a tablespoon of beaten egg white and drop it slowly in the simmering milk (not boiling) .
4. Repeat the process till you finish all the beaten egg white.

Drop the egg whites carefully into the simmering milk

5. Turn them carefully to cook both the sides. Each will take about 2 to 3 minutes to cook.


6. Remove them from the kadai and keep aside.


7. Now bring the milk to a boil. Mix custard powder with cold milk. Pour this in to the boiling milk stirring continuously. Add sugar and cook it till the sugar dissolves. (At this stage you can add one beaten egg  yolk making sure it does not curdle. Its optional).
8. Cool the custard and the essence.
9. Take a serving bowl, pour the chilled custard and place the islands carefully on it.
10. Decorate your floating island with raisins herbs or even fresh fruits of your choice. I added some sliced grapes, a mini mint "tree" , chopped mint leaves and lovely nasturtiums from our garden! 

Wednesday 4 March 2015

Blogging Marathon Entry - Scotch Eggs!


   I have been looking forward to this Blogging Marathon for a long time! Although I have not been following all the blogs in the group, my daughter is a fan of cooking4allseasons.blogspot.in  and the Andhra Mutton Fry recipe that Srivalli has posted is a big hit in our family. She introduced me to this marathon and it amazed me to see so very many talented people pouring their life experiences, family recipes, children's stories and so much more. I immediately signed up for this marathon and made all the recipes in advance.

   But unfortunately, a wedding I attended day before yesterday gave me food poisoning and I was unable to post yesterday's entry. So I am posting two entries today to make up for the lost day :( 

   This recipe I learnt many many years back and I cannot even recall the last time I made it! But I do remember that this was very well received. Somehow, as we grew older we tried to eat more consciously and this fried food didn't find its way into our regular cooking. But when I sat down to think of things to make with egg, I simply had to share this recipe! Make it on a cold wintry day and serve it with chutney or sauce and its the ultimate comfort food!

Ingredients :
1. Potatoes : 4 (medium size) boiled
2. Eggs :  3 nos (hard boiled)
3. Bread crumbs : 1 to 1 1/2 table spoons
4. Salt and Pepper :  To taste
5. Oil :  For frying
For coating :
1. Egg : 1
2. Bread crumbs : 1/2 cup (approx)

Method :
1. Boil and peel the eggs and keep aside.
2. Boil,peel and mash the potatoes.
3. Add salt, pepper and bread crumbs to the mashed potatoes. Mix them nicely without any lump. 
4. Beat the egg with a little salt and pepper and keep it ready.
5. Take a boiled egg and wrap it fully with the mashed potato mix as shown below.


6. Now dip it in the beaten egg and coat with bread crumbs(roll it in the bread crumbs all around).
7. Repeat it for the other eggs and keep them ready.


8. Heat oil and deep fry them on medium heat (oil should not be very hot).
9. Drain and serve hot with green chutney or ketchup.


10. It can be served as a snack, for breakfast or as a side dish for continental dinner! Hope people try it and enjoy it!

Egg Drop Soup

Check out the Blogging Marathon page for the other Blogging Marathoners doing BM#50

As I mentioned in a previous post, Abi is a very picky eater. To add protein to his diet, I give him boiled or poached eggs. But after his initial interest in egg, he is now creating difficulty in eating it. Since he doesn't eat protein in any other form, I don't want to stop giving egg. Similarly, he doesn't eat vegetables, so I make a soup of all vegetables (in different combination) for him every evening and somehow force it down his throat. 

Having chosen egg as an ingredient for the BM, I was thinking on what to make with egg. I struck upon the idea of making this soup. It perfectly combines vegetables and eggs (in fact, it can be made with chicken stock also, which I am planning to try next time). The best part was that Abi actually relished it and kept asking for more! I think I'm going to call this my dream-come-true soup!!!

Egg Drop Soup:


Ingredients for the soup:

1. Veg/ non veg stock -  2 cups (recipe for veg given below)
2. Eggs - 2
3. Cornstarch - 1.5 tsps
4.Salt and white pepper to taste

Method:
pouring the egg into the broth

1. Whisk the eggs in a bowl and keep aside. Its best to keep the eggs in a bowl/cup with sharp edges.
2.Take a saucepan and pour all but 2 tablespoons of the stock into it and bring it to a boil.
3 Mix corn starch with the remaining 2 tablespoons of stock.Then pour this mixture back into the saucepan. Let it boil for a minute while stirring it gently. The stock will get a bit thicker.
4. Lower the flame to the minimum.
5. Now, here's the part to be careful. Slowly pour the egg into the broth through a fork so that the egg does not lump up.Switch off the gas immediately.
6.Add the chopped chives for garnish and mix.
7. Let it sit for a minute and then serve.

How to make a Veg Broth:

Ingredients:

1. Leftovers from cut vegetables like cauliflower stem and leaves, peas shell, potato skin, etc.
ingredients for the stock
2. Some cabbage leaves, 1 chopped carrot, 1 chopped turnip with leaves, chopped chives
3. Whole spices:
   a) ginger - 1/2 inch
   b) star anise - 1
   c) cloves - 2-3
   d) bay leaf - 1 piece
   e) cinnamon stick - 1/2 inch
4. Water - 3 cups

Method:

1. Put all the ingredients in a cooker. 
2 Bring it to one whistle and simmer for about half an hour.
3. Once the steam is gone from the cooker, take out all the veggies in a strainer and mash it nicely so that the juices pass through the strainer.
4. Vegetable broth is ready!

in the cooker
after cooking


Related Posts Plugin for WordPress, Blogger...